Table of Contents
5 easy steps…
Elevate your social media game by unlocking the hidden setting for high-quality photo and video uploads. While Instagram defaults to lower-quality uploads to expedite posting, you can enhance your content by following these simple steps.
Step 1: Launch the app and navigate to your profile.
Step 2: Tap the menu icon in the top-right corner, resembling a series of lines stacked together.
Step 3: Head to “Settings and privacy.”
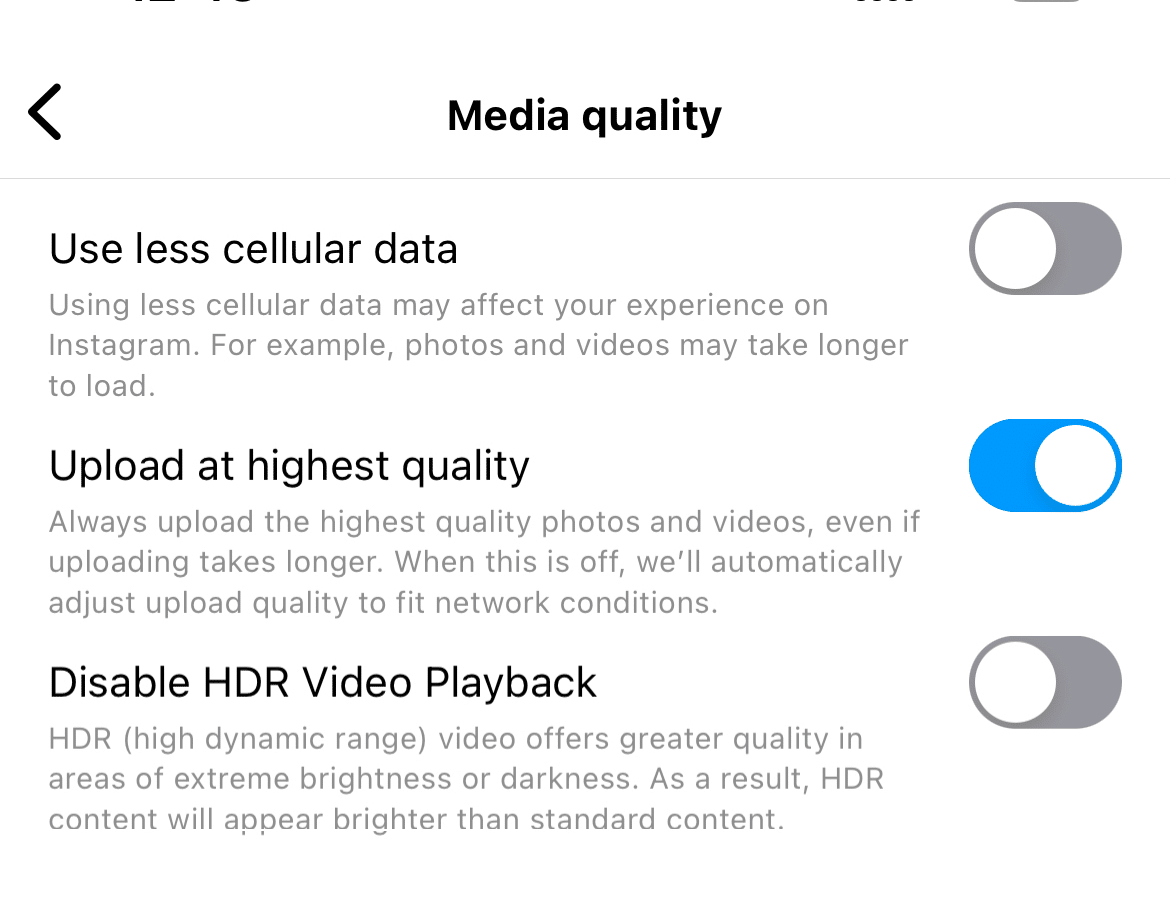
Step 4: Scroll down to locate the “Media quality” option and tap on it.
Step 5: Find “Upload at highest quality” and toggle the switch to the ON position.

Elevate you Instagram game
Voila! Your photos and videos will be posted with the utmost quality possible. This step-by-step guide is tailored for iPhone users, but fear not, Android users can also find this setting in their Instagram app.
The mysterious decision to keep this setting off by default remains unknown. Presumably, it aims to save bandwidth and expedite the posting experience. Keep in mind that enabling HD uploads may consume more network bandwidth and cellular data, leading to slightly longer upload times. For avid users craving top-notch visuals, the trade-off is often worthwhile. However, if you’re bandwidth-conscious, you might want to weigh the benefits against the data usage.
As a bonus, there’s an additional option to “Disable HDR Video Playback” for users bothered by Instagram videos altering screen brightness. For now, our focus remains on the media quality setting, a key to transforming your Instagram feed into a high-definition haven.
Stay updated on all of the latest news by subscribing to the ITP Live newsletter below and by clicking the push notifications.


