Ever wondered how some influencers, professional photographers, and image curators can create amazing carousel layouts that just seem impossible for non-techs to achieve? Well worry no more, as we have found the best and easiest platform to create that professional polish to up your feed game.
What is a carousel on Instagram?
In short, most people refer to the carousel posting option as the “multiple posts”. A useful tool that we’ve seen featured thousands of times by Instagrammers that enable users to provide more variety of photos or videos or both content to their followers. Saying this, a seamless carousel is either one largely elongated photo spread out over multiple slides without any visible photo slashes when swiping. Creative users have found multiple ways to personalize seamless carousels by playing with collage effects, allowing the images to flow into each other. The difference between a single photo carousel from a collage carousel is that of one photo spread out across different slides, the collage version is a combination of photos that create one long seamless swiping experience.
We have broken down an easy step-by-step summary on how to create a seamless carousel with Canva:
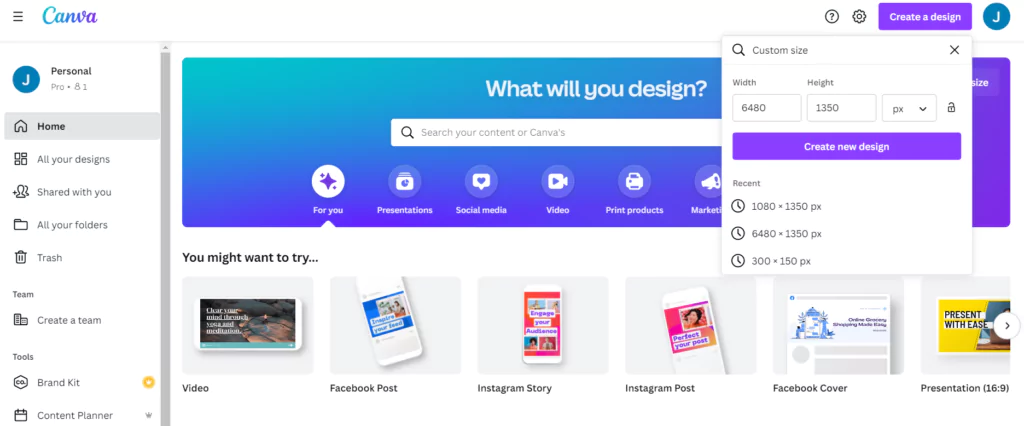
Step 1: Define the right size for your desired post in your Canva dashboard, go to create a design, and select Custom Size.

In Instagram, you can add carousels with up to 10 single slides, by either having a 4×4 format or an elongated 5×4 portrait format, which we recommend is the optimal formatting to use. As a shortcut, we’ve provided the design sizes for carousels with 2 to 6 slides:
- 2 Slides: 2160 x 1080px (or 1350px)
- 3 Slides: 3240 x 1080px (or 1350px)
- 4 Slides: 4320 x 1080px (or 1350px)
- 5 Slides: 5400 x 1080px (or 1350px)
- 6 Slides: 6480 x 1080px (or 1350px)
Step 2: Design the Carousel Graphic in Canva
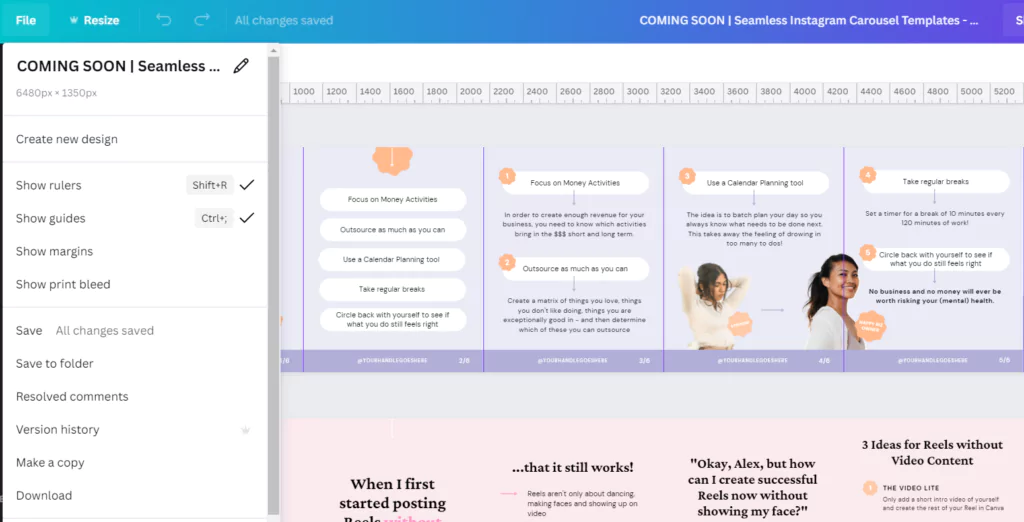
Now that you’ve laid out your foundation, it is important to understand where the screens will be split. Use Canva guides + define rulers to understand where one photo will end and the other one will begin. To enable guides, in your design click on File (in the top left corner) and then tick both Show Guides and Show Rulers. Drag your ruler from the left and place it onto your blank canvas. Add a ruler guide every 1080px to mark the borders of your carousel slides.

Step 3: Split your Instagram Carousel Design, ready to post
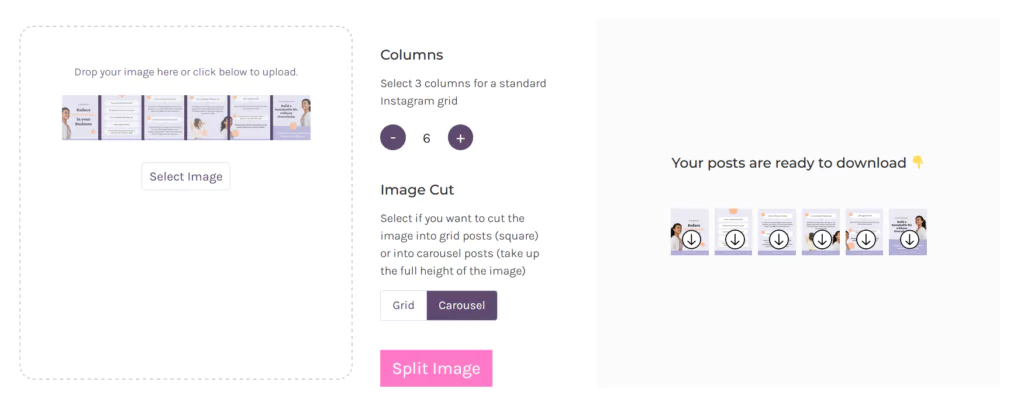
Now, this is the tricky part, once finished your design, download it and split it into single posts. Use Instagram Grid Maker, and click on the Upload an Image button. Select your carousel graphic and upload it into the tool. Set your Columns to the number of slides you desire and Image Cut to Carousel. Next select Split Image which will cut your carousel into slides.

Step 4: Finally Upload your Carousel Slides to Instagram
What are the advantages of creating a seamless carousel?
First and foremost it is a refreshing way to tell a story. A seamless carousel allows you to tell a story from start to end without any interruptions rather than scrambling around trying to fit your perfect holiday images all in one frame.
Secondly, not only does it allow you more room to tell where you’ve been or what you’ve experienced, but it is amazing for the Instagram algorithm. In general Instagram carousel posts are shown multiple times to your followers if they scrolled passed your first photo or haven’t liked your post, it will then reappear and display the second or third photo in the feed.
Thirdly, Instagram is all about engagement, and what better way to create creative interaction with followers than to not make them feel they are looking at multiple photos? Top tip to always remember; the longer you can keep viewers hooked on your post the more Instagram will suggest your profile and prioritize your posts in users’ feeds. And lastly, we cannot think of a more unique and creative way for your profile to stand out from the millions of users’ posts.
Comment below and let us know what you think of this how-to article to make your Instagram unique.
Stay updated on the latest how-to guides by subscribing to the ITP Live newsletter below:


